Tuesday, August 7, 2012

Wedding Gown Alterations

For the past several months we've had an array of wedding gowns come through our shop. We've done many different alterations to each gown. Each dress is very unique in style to every other one but it makes it fun to work on each dress.


Monday, April 30, 2012

Embroidery Hoop Nursery Decor

Since my new niece, Juliet was recently born we wanted to make her a set of embroidery hoops with her name on them for her nursery. Here's a step by step tutorial on how we made them. 

First, if you don't want the original wood color of the embroidery hoops you can paint them. We painted ours white.
 Before printing the letters you have to decide the layout order of the embroidery hoops because they will be different sizes. Next, print out each letter according to the size of the embroidery hoop it will be going on.

Cut out each letter.

Pick your fabrics and trace with chalk on the wrong side of the fabric around the embroidery hoop. Cut 3/4" past your marking line.

 Here I've cut almost all the fabrics.
 Cut out each letter with fabric and fusible interfacing. Fuse the interfacing onto the letter. Pin the letter in the center of your fabric circle and stitch an 1/8" in from the edge of the letter. We are creating a raw edge applique.
 Put your fabric in the embroidery hoop and trim the excess material away. You are now finished!

Here's what all our letters look like in the end.


Thursday, April 19, 2012

Learning to Sew at an Early Age!

Eloise, our niece loves to come into our shop and watch us sew. She has been learning to say so many new words latetly so it's fun to hear her talk. Here's a little video of her talking away with us in the shop the other day.


Monday, April 16, 2012

Lollipop Dress

My name is Emily, I am fourteen years old, and I have been working at Bella Jean Boutique for about a year. Recently I got to take home a project and complete it from start to finish. Since we have been having some sunny days I made a lightweight, cotton dress. The combination of the tie and shirred sleeves makes it a little adjustable just in case your daughter grows over the summer. One of the sunny days last week my niece was over and I got the opportunity to take pictures of her in the dress. I am looking forward to taking on more projects like this.


Thursday, April 5, 2012

Classic Vintage Sailor Dress...

Ever since we have been on our new venture to make clothing that is classic and beautiful, I have been looking for a vintage pattern to make a sailor dress. I have always loved them, and done the right way I knew this could be a hit! After endlessly searching, I found a pattern for the style I wanted. Unfortunately that pattern was not for sale anywhere! Finally I decided it was time to make up a pattern. I found three patterns that I already had that were to make up this dress...
The dress I was copying


From this pattern I used the sailor style collar.


I used the bodice of this one...since it crossed in front I was able to make modifications, This way it gave me the double breasted look I wanted! 
I took the sleeves and skirt from this pattern...
As you see, a little creativity, some adjustments and details made this dress have the look I wanted! O and did I mention...Those buttons unbutton and the whole front of the dress opens up to make it easy to get on and off your little one!


Monday, March 26, 2012

Same & Next Day Alterations...

Often times we get customers who need something altered for their work uniform the same or next day.  If you are one of those people who have a suit, pants, shirt, skirt, Military or law enforcement uniform that needs altered quickly, we are your solution! Not only are we same or next day alterations for work uniforms, but if you have to drive for 20 min or more to get to us, you can relax in our beautiful shop while we alter your clothing on the spot. 

To contact us for a same or next day alteration, please visit our website.


Monday, March 19, 2012

Classic-Style Clothing...Is there a need?

There seems to be a large need in our society to dress girls like young girls and not adults. Shopping for girls these days especially ages 7-14yrs. you mostly find trendy shirts, short, short dresses and skirts, tight jeans and dark colored clothing. It can be a challenge to find that simple, beautiful dress with a little collar, smocked bodice, and soft print that keeps your children looking like children. Our goal is to create a line of classic-style clothing using patterns and styles from the 30's-50's. All the dresses seem to be simple solid colors with accents of embroidery or a coordinating color. 

Let me know your thoughts on this or feel free to show me styles that you would like to see your daughters in!


I especially love this dress below. The pattern seems to be sold out everywhere I have found it so if you know of one similar please let me know!


Sunday, March 11, 2012

Custom Bags...Messenger...Beach

Recently we've been designing and creating quite a few bags. Everything from a simple beach bag to a canvas messenger bag meant for student's laptops, iPads and everything else. The great thing about getting a custom bag made is you can decide how many pockets you want, what size you want them, where they should go, and add any other little accessories you desire for your ultimate bag. We take all of your ideas and draw up a design for you so you can visualize it before beginning. Picking your specific fabric is the funnest part. We've done everything from bright, funky colors to a sleek and simple tan canvas material. Let us see your ideas for your dream bag so we can help you make it a reality!


Tuesday, February 21, 2012

Spring Knitted Sweaters...


As the days are getting sunnier and a little bit warmer, coats are nice but may still be a bit too heavy. At Bella Jean Boutique, we have a lovely selection of knitted and crocheted sweaters, in many different styles and colors, perfect for spring weather.

           This dressy lace edged cardigan is hand knitted from cotton.


Here is a nicely styled cardigan and hat for a boy or a girl. It is made from a cotton blend yarn and is very soft. This sweater can be made from the cotton in a variety of colors as shown.


This is a soft sweater made with a mix of cotton and acrylic yarn. It is
      available in many different colors as well as sizes.

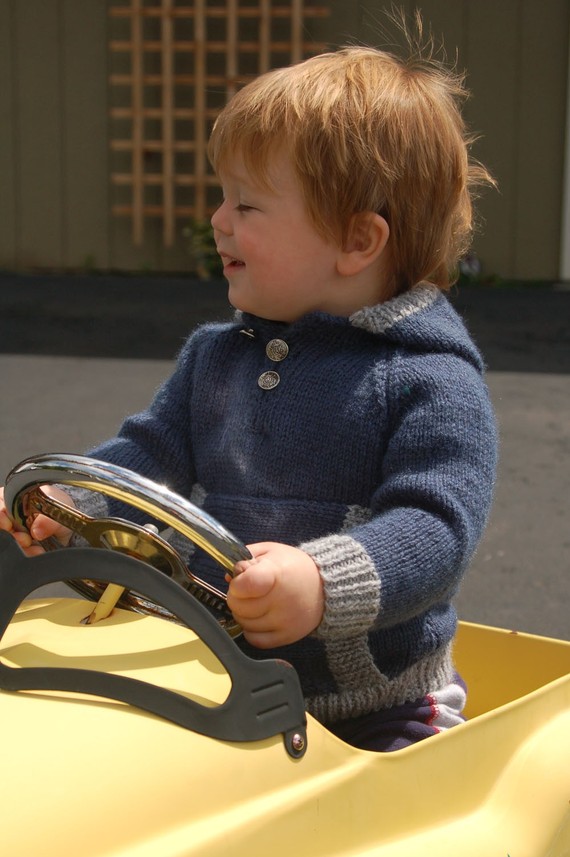
Made from wool, this sweater is perfect for cool days. It can be made in a variety of colors.


         With its embroidered accents, this cardigan makes the perfect outfit for a
                chilly spring day. It is made from a cotton blend yarn and is very soft.
We have many more styles in our Etsy shop (http://www.etsy.com/shop/BellaJeanBoutique).

Wednesday, February 15, 2012

Ruffly Lace Skirt Tutorial

Lately I've been seeing a lot of tiered ruffled skirts around and love them. I had extra pink lace fabric sitting around so I decided to make a skirt using it. (I love being able to use fabrics I have on hand. With this skirt you can make any size you want. My skirt has a 16" waist size. 


First: Cut 5, 2 1/2"x the width of the fabric out of your lace. Then put a gathering stitch through each one.
 For the base of the skirt I cut 2,  10"x13" rectangle. Depending on the size you are making you can cut your fabric longer and wider. Basically your width should be about 10" bigger than your waist size and you length should be about 1 1/2" bigger than your finished length.
 Seam one side of your base piece together.
 Open out your base fabric so it is laying flat. Now begin adding your ruffles to the base. For your first ruffle match up your raw edges. For the next ruffle and so on I started them about 1/2 way under the ruffle above.
Now all your ruffles should be added. Cut a piece of 1 1/2" wide elastic to the waist size you want. Mine is 16". Pin one end of your elastic to one end of your skirt. Now find the center of your elastic and the center of your skirt and pin those in place together. Your elastic should sit a 1/2" down from the top of the skirt. Your elastic will be smaller than your skirt so don't worry.

 Now begin sewing your elastic to your skirt. You have to stretch the elastic as you sew so it stretches out to the size of the skirt.
 When you are finished sewing your elastic, put your whole skirt right sides together and sew through all the layers using a 1/4" seam allowance. Now hem the bottom of your base fabric. That's all there is to it! If you have any questions please let me know!